Thought I would write out an actual how-to! Usually I’m the one following someone else’s, but in this case there was none I could find. While mocking up a DIY-style intake for the TNT 135, I figured I might as well pull out the charcoal canister system because it would help to clean up the area I was working in, and will also help save a tiny bit of weight.
I suspect the reason why I haven’t found any documentation yet was because this is a US system that isn’t present on models sold around the world. This is highlighted when I looked at the official partslist I found online and it didn’t even have this system noted.
Thankfully this is a really easy removal process, all it requires is a 10mm wrench, a pair of pliers, some zip ties, a dirt bike gas vent hose, a rubber cap, and some wire (optional).
Pre-Step: Remove the tank shrouds and the right ankle guard above the foot peg (I’ll let you figure out the details on your own).
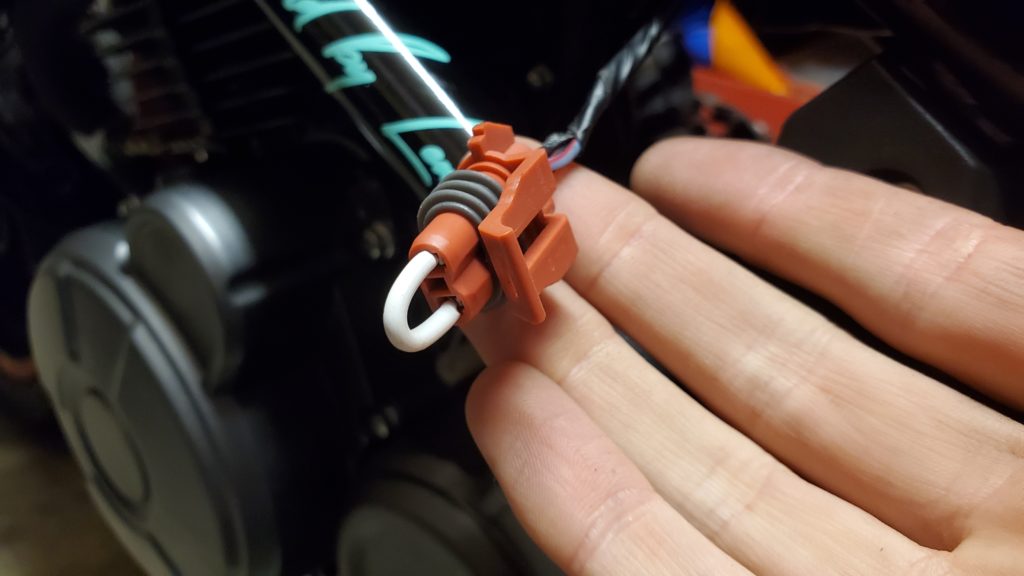
Step 1: Unplug the wire connecting to the system. This plug is orange and grey and will be found on the left hand side above the front sprocket.
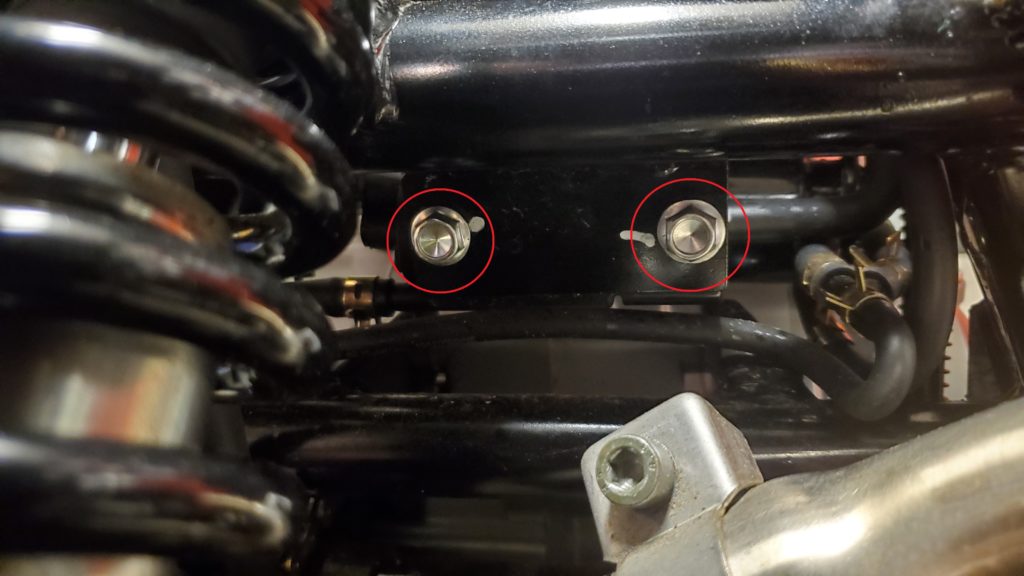
Step 2: Remove the charcoal canister bracket. This is held on by two 10mm bolts located in the rear just above the swingarm, next to the rear shock
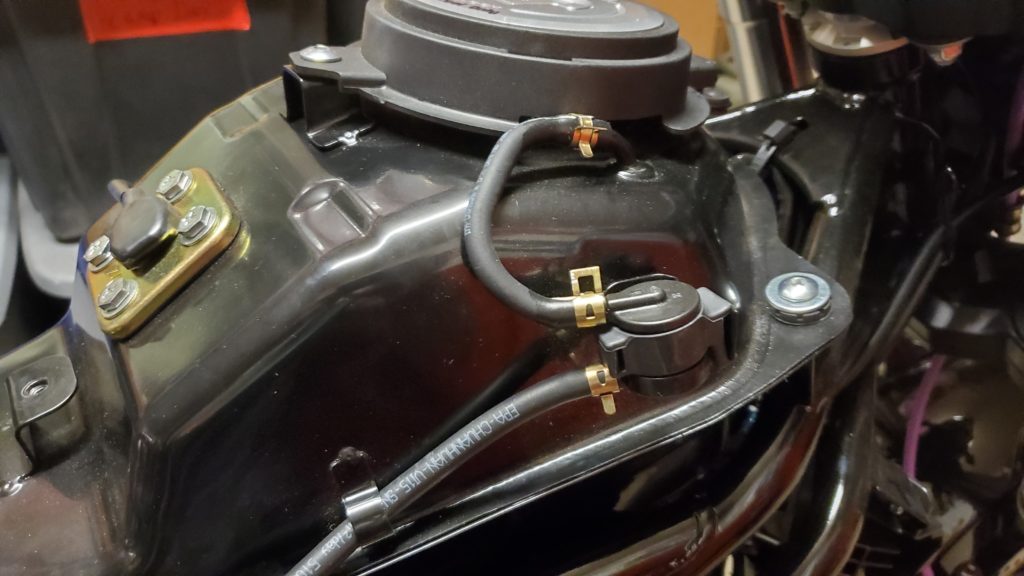
Step 3: Remove the vent hose and connecting filter coming from the right of the fuel door.
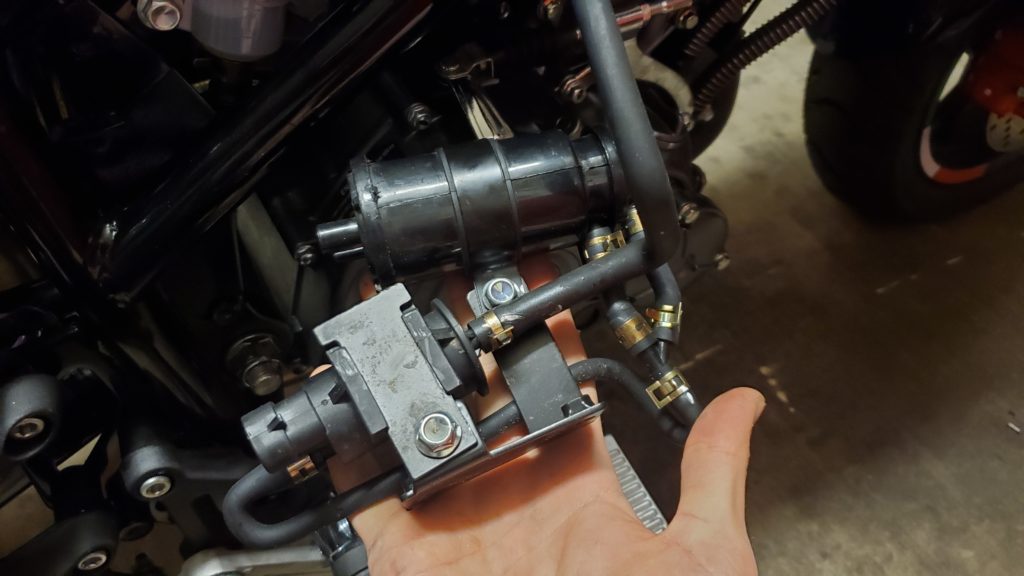
Step 4: Fish out the entire system from the tubing at the fuel door all the way down to the charcoal canister system itself. I found it was easier to disconnect the long tube coming from the top at the canister and pull it through the holes connected to the gas tank. The rest of the system below the airbox can come out as one piece from the right hand side.
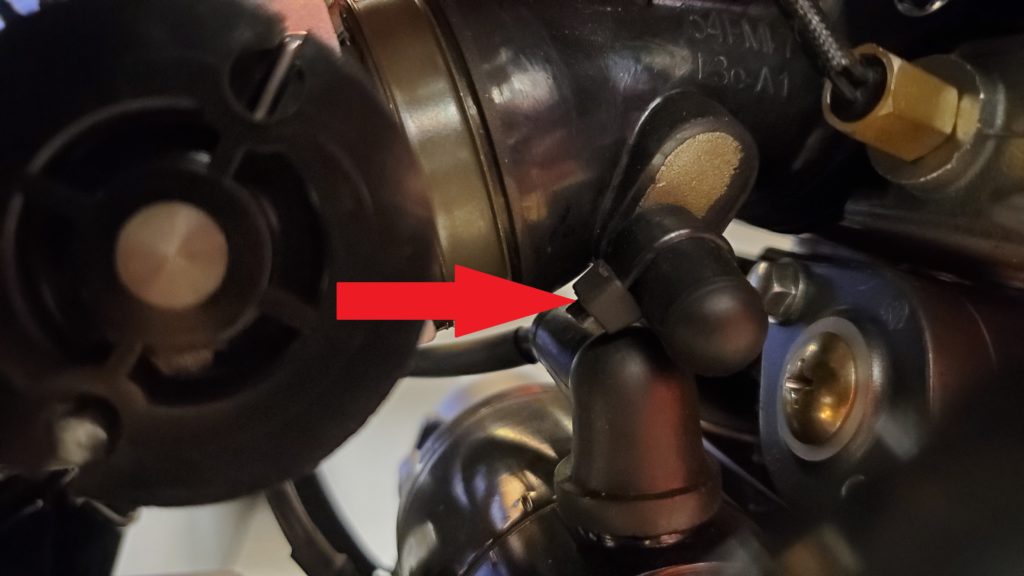
Step 5: Cap off the hole going back into the throttle body, on the right hand side.
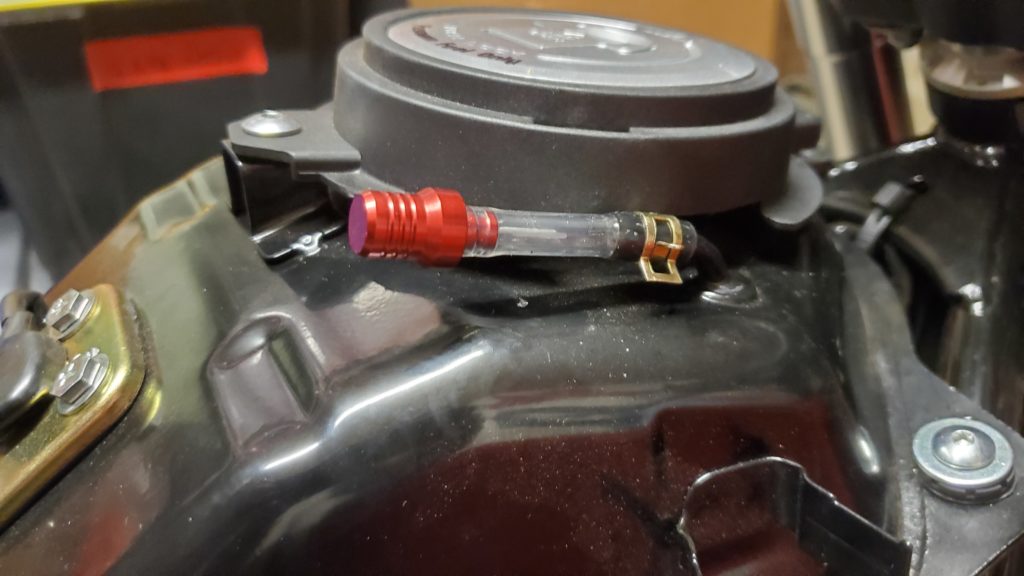
Step 6: Attach a dirt bike vent hose to the top near the fuel door.
Step 7: Fit a wire into the plug to complete the system, otherwise you will have a check engine light on the dash. I did this to preserve the plug in case I need to put it back in. Alternatively you could cut the plug out and tie the two wires together the complete the circuit. Tape it up with electrical tape and tuck it out of the way. I zip tied it to the wiring harness it came from so it wouldn’t dangle.
Post-Step: Fire up the bike to make sure nothing seems off and that the check engine light stays off when running. Put the plastics back on and go ride it!
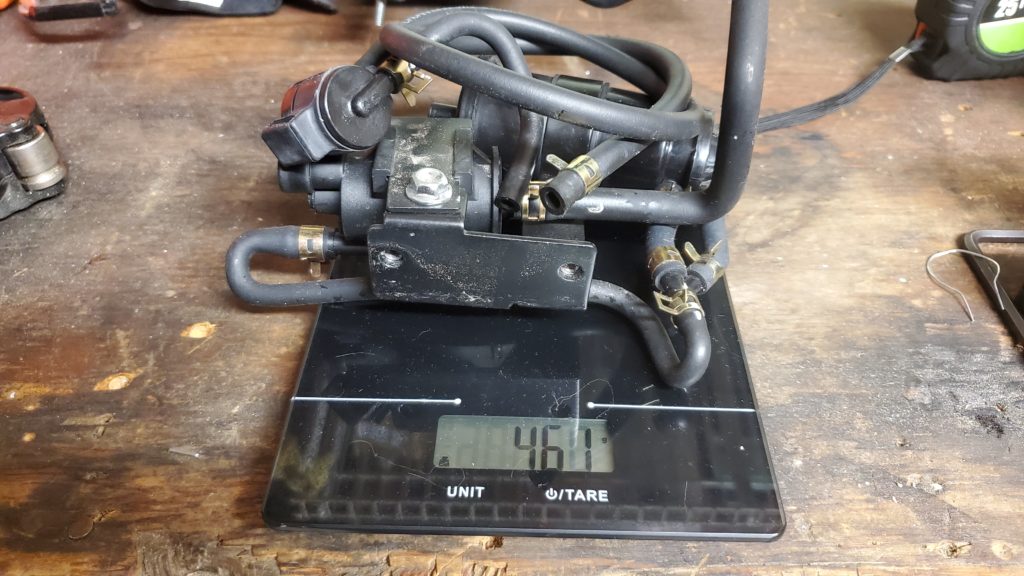
And that’s it! Pretty easy, frees up space under the airbox (and space is at a premium on this bike, it’s so tightly packed!), and shaves off about 1/2 a kilogram. It’s not a huge weight saving, but every bit helps.